I have some pods. They aren’t my favorite (due to the slow action) but they are probably more appropriate for the intent of a “budget” and “simple” build.
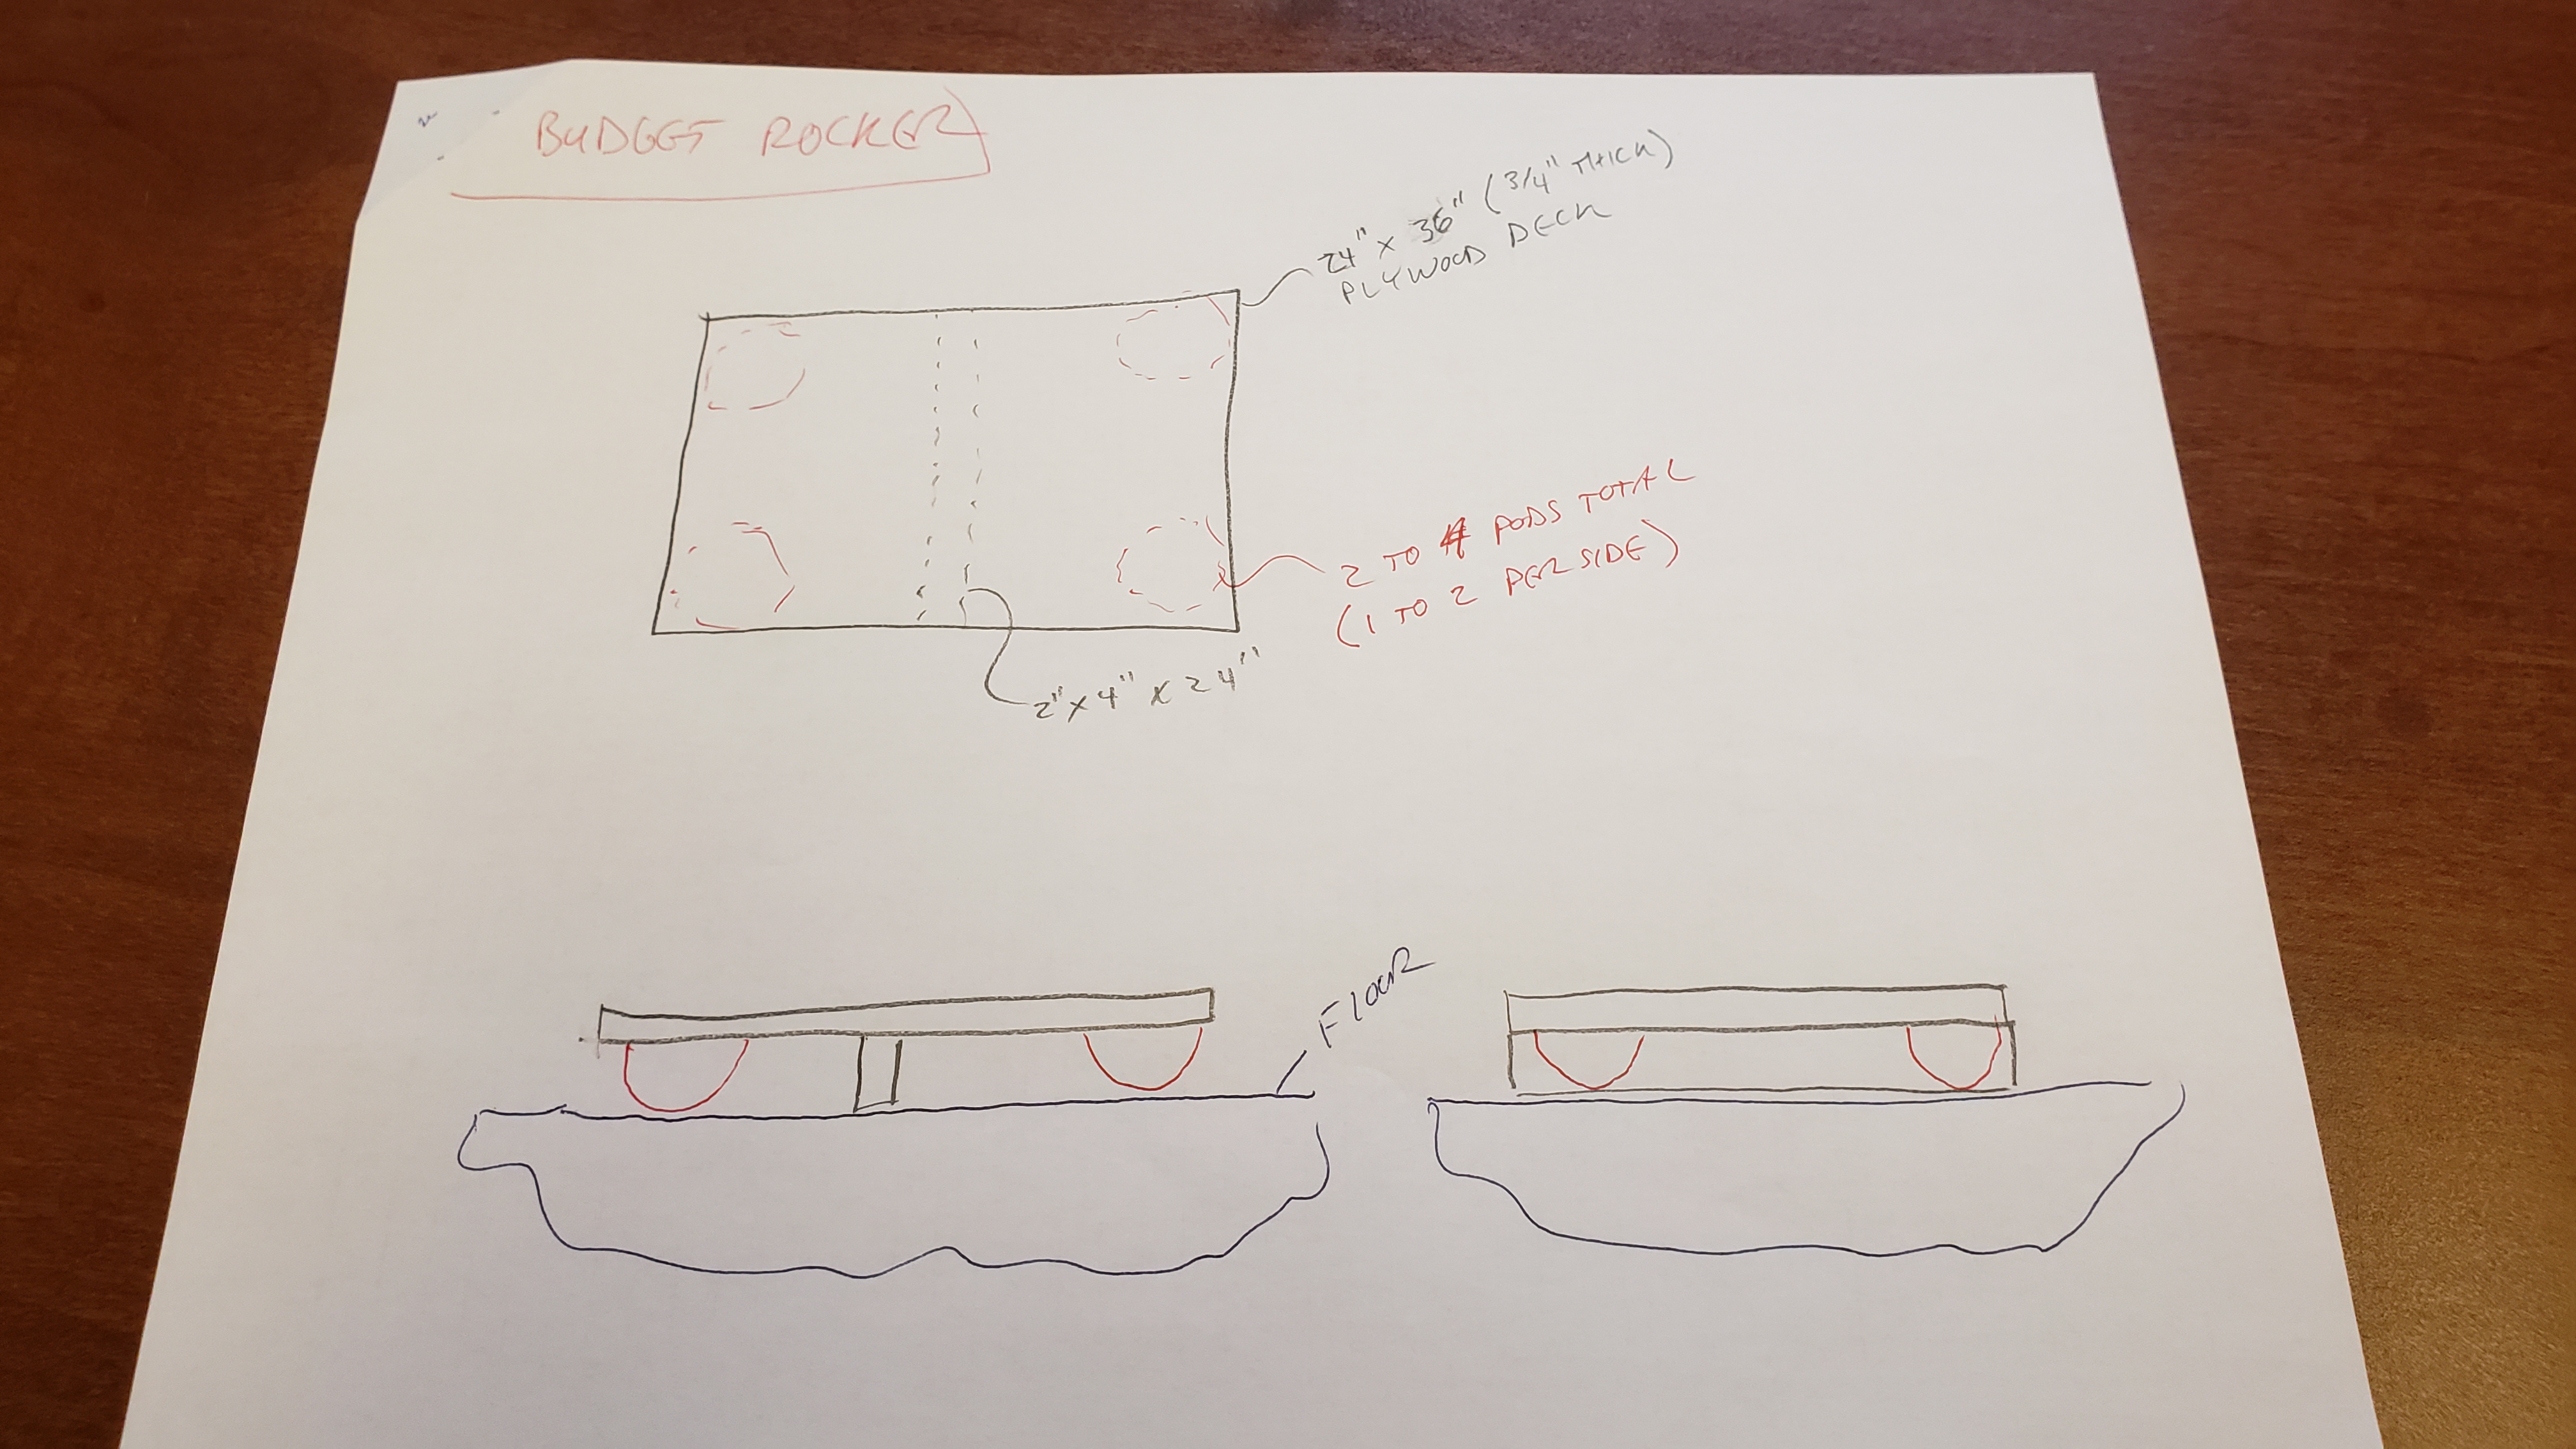
My basic idea was a 2’ x 3’ piece of plywood deck, with a 2" x 4" x 24" long board as the center “axis” and simple springs on the sides (tennis balls, balance pods or some other springy material). Maybe some retention straps to hold the trainer and that’s it. Dead simple and can be built with a screw driver.
I prefer a rigid center, compared to the floating effect that happens with pods, but those work too and keep it even more simple. I just dislike the “bounce” that happens with a full spring support (and no rigid center).
Nothing between the plywood and the pods. The whole thing seems to flex in the vertical direction and virtually no lateral. I did put a piece of no-slip shelf liner on the 4x4s to keep the front wheel block from slipping around.
I think this seems like an easy MVP product too. Thanks for sharing! I was wondering what I could do in the middle of @ZeroGravity’s design to give it a pivot point. This answers that question.
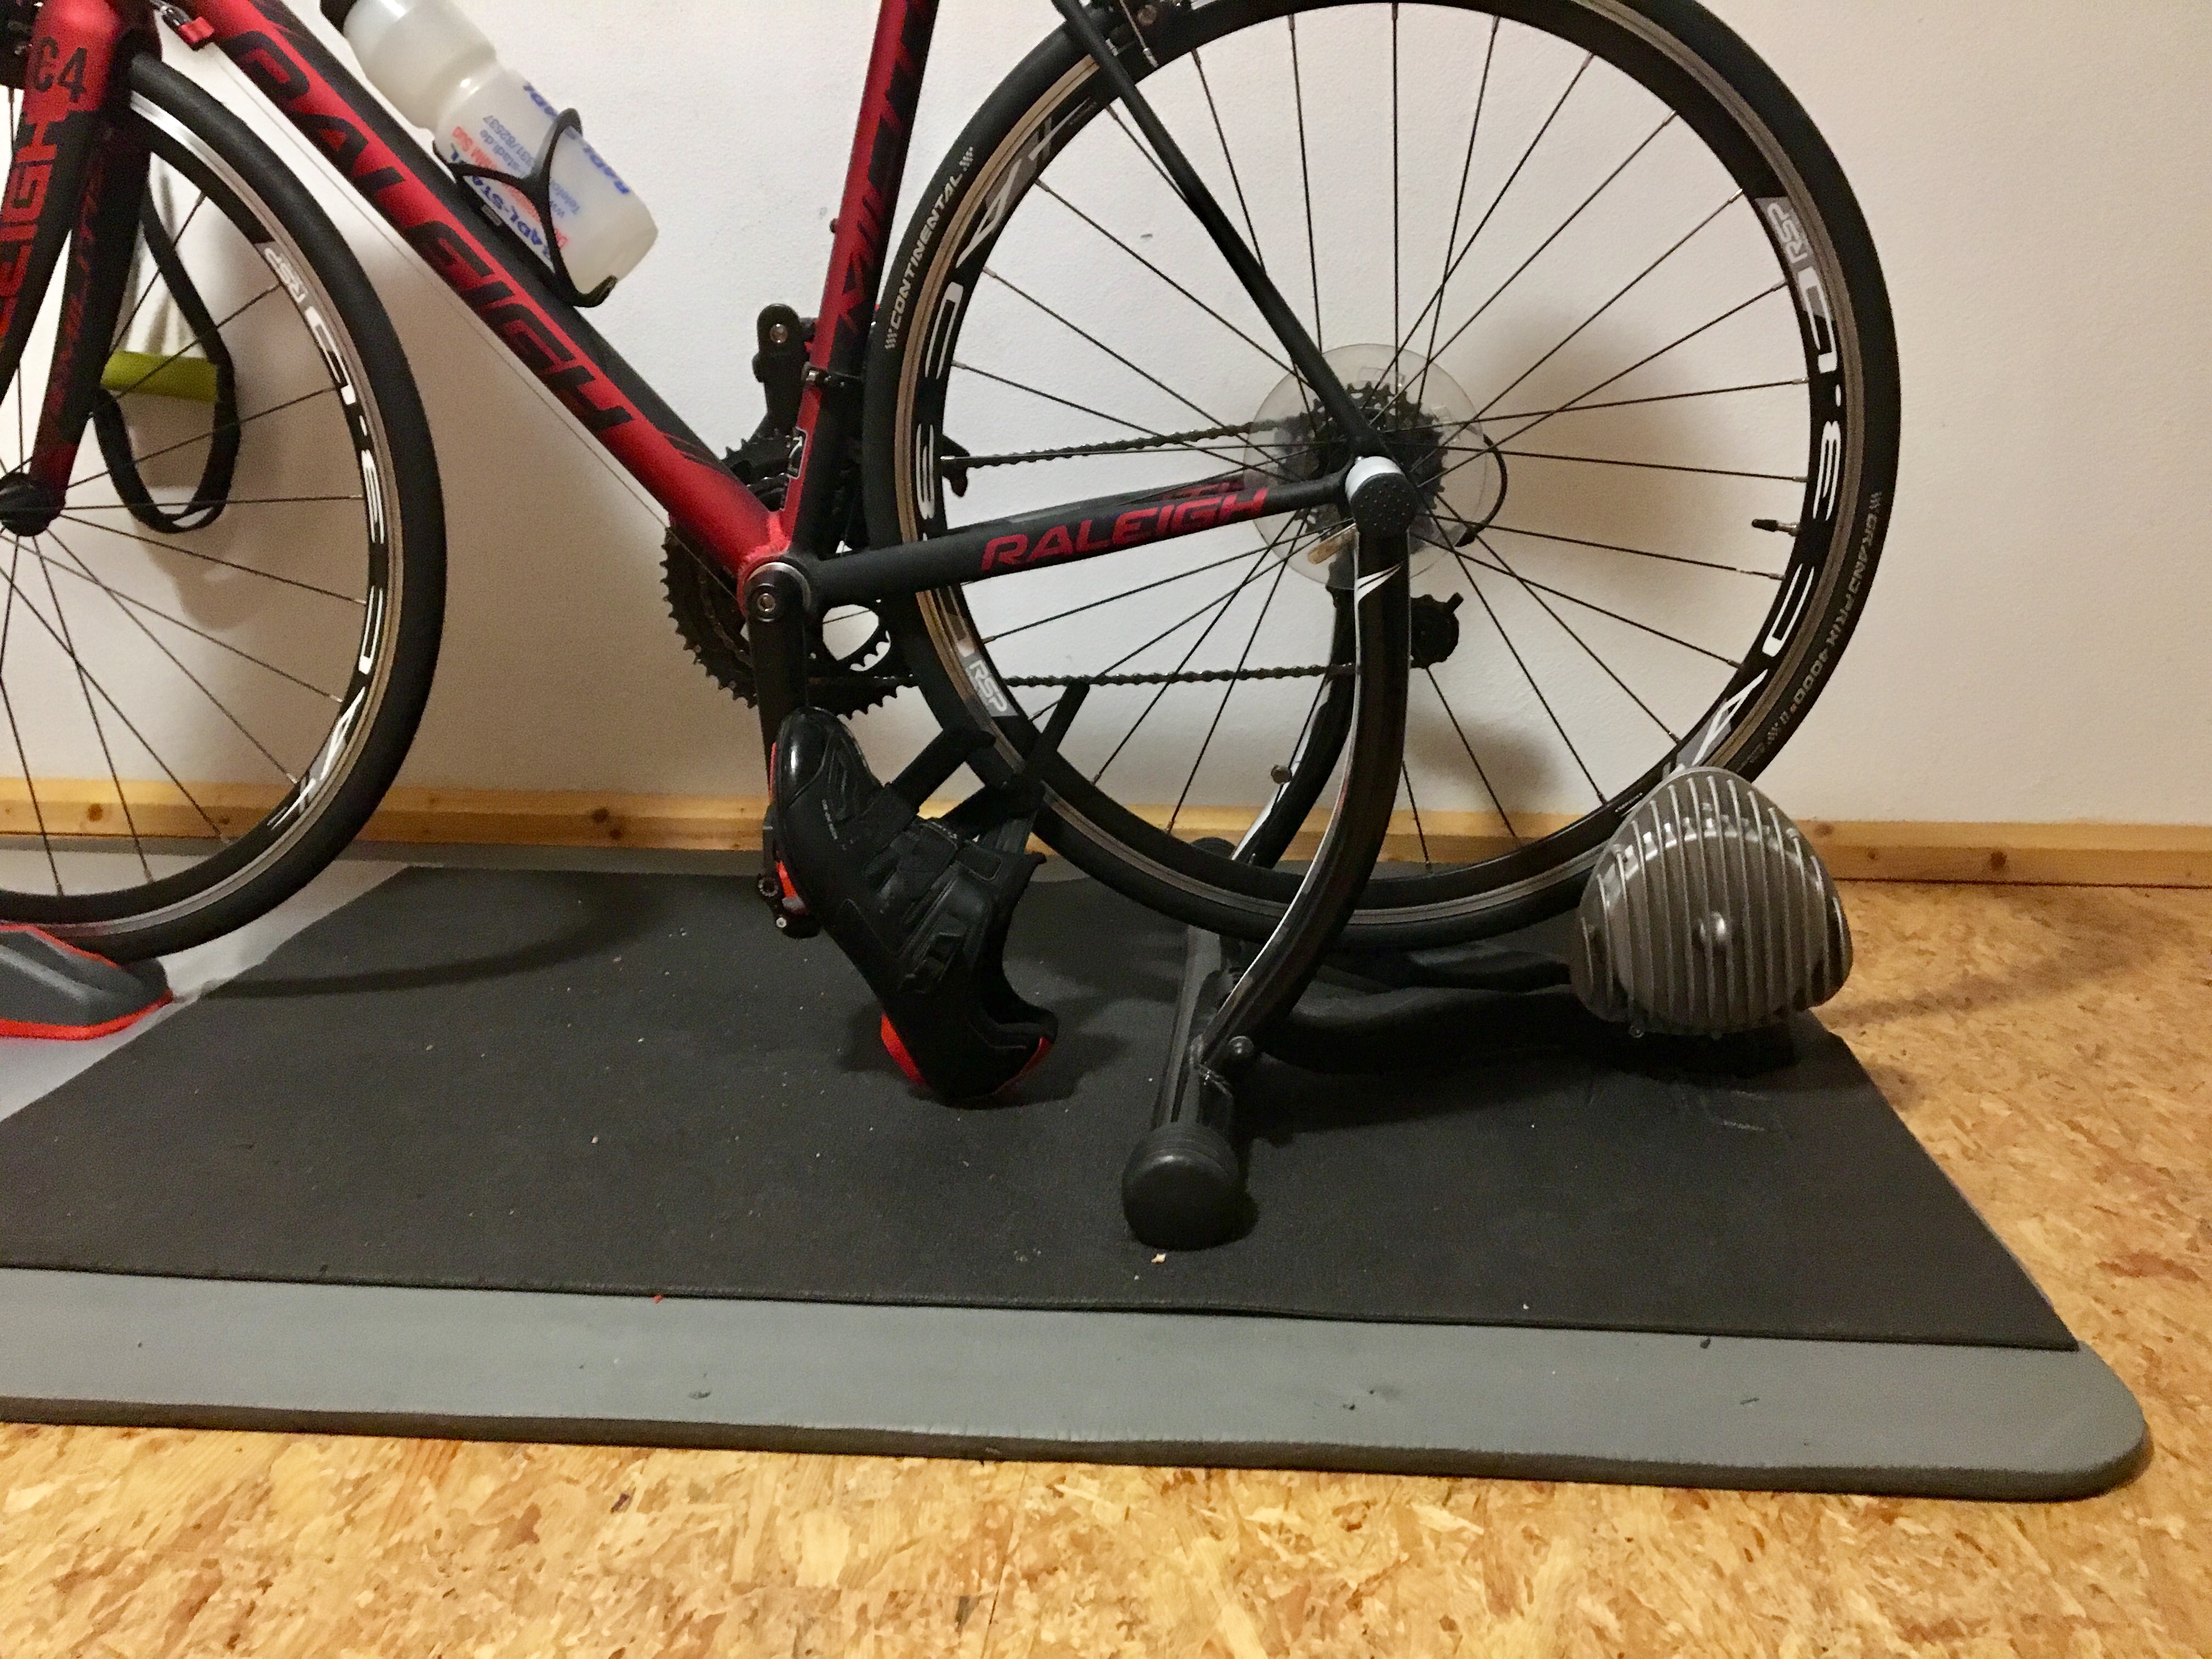
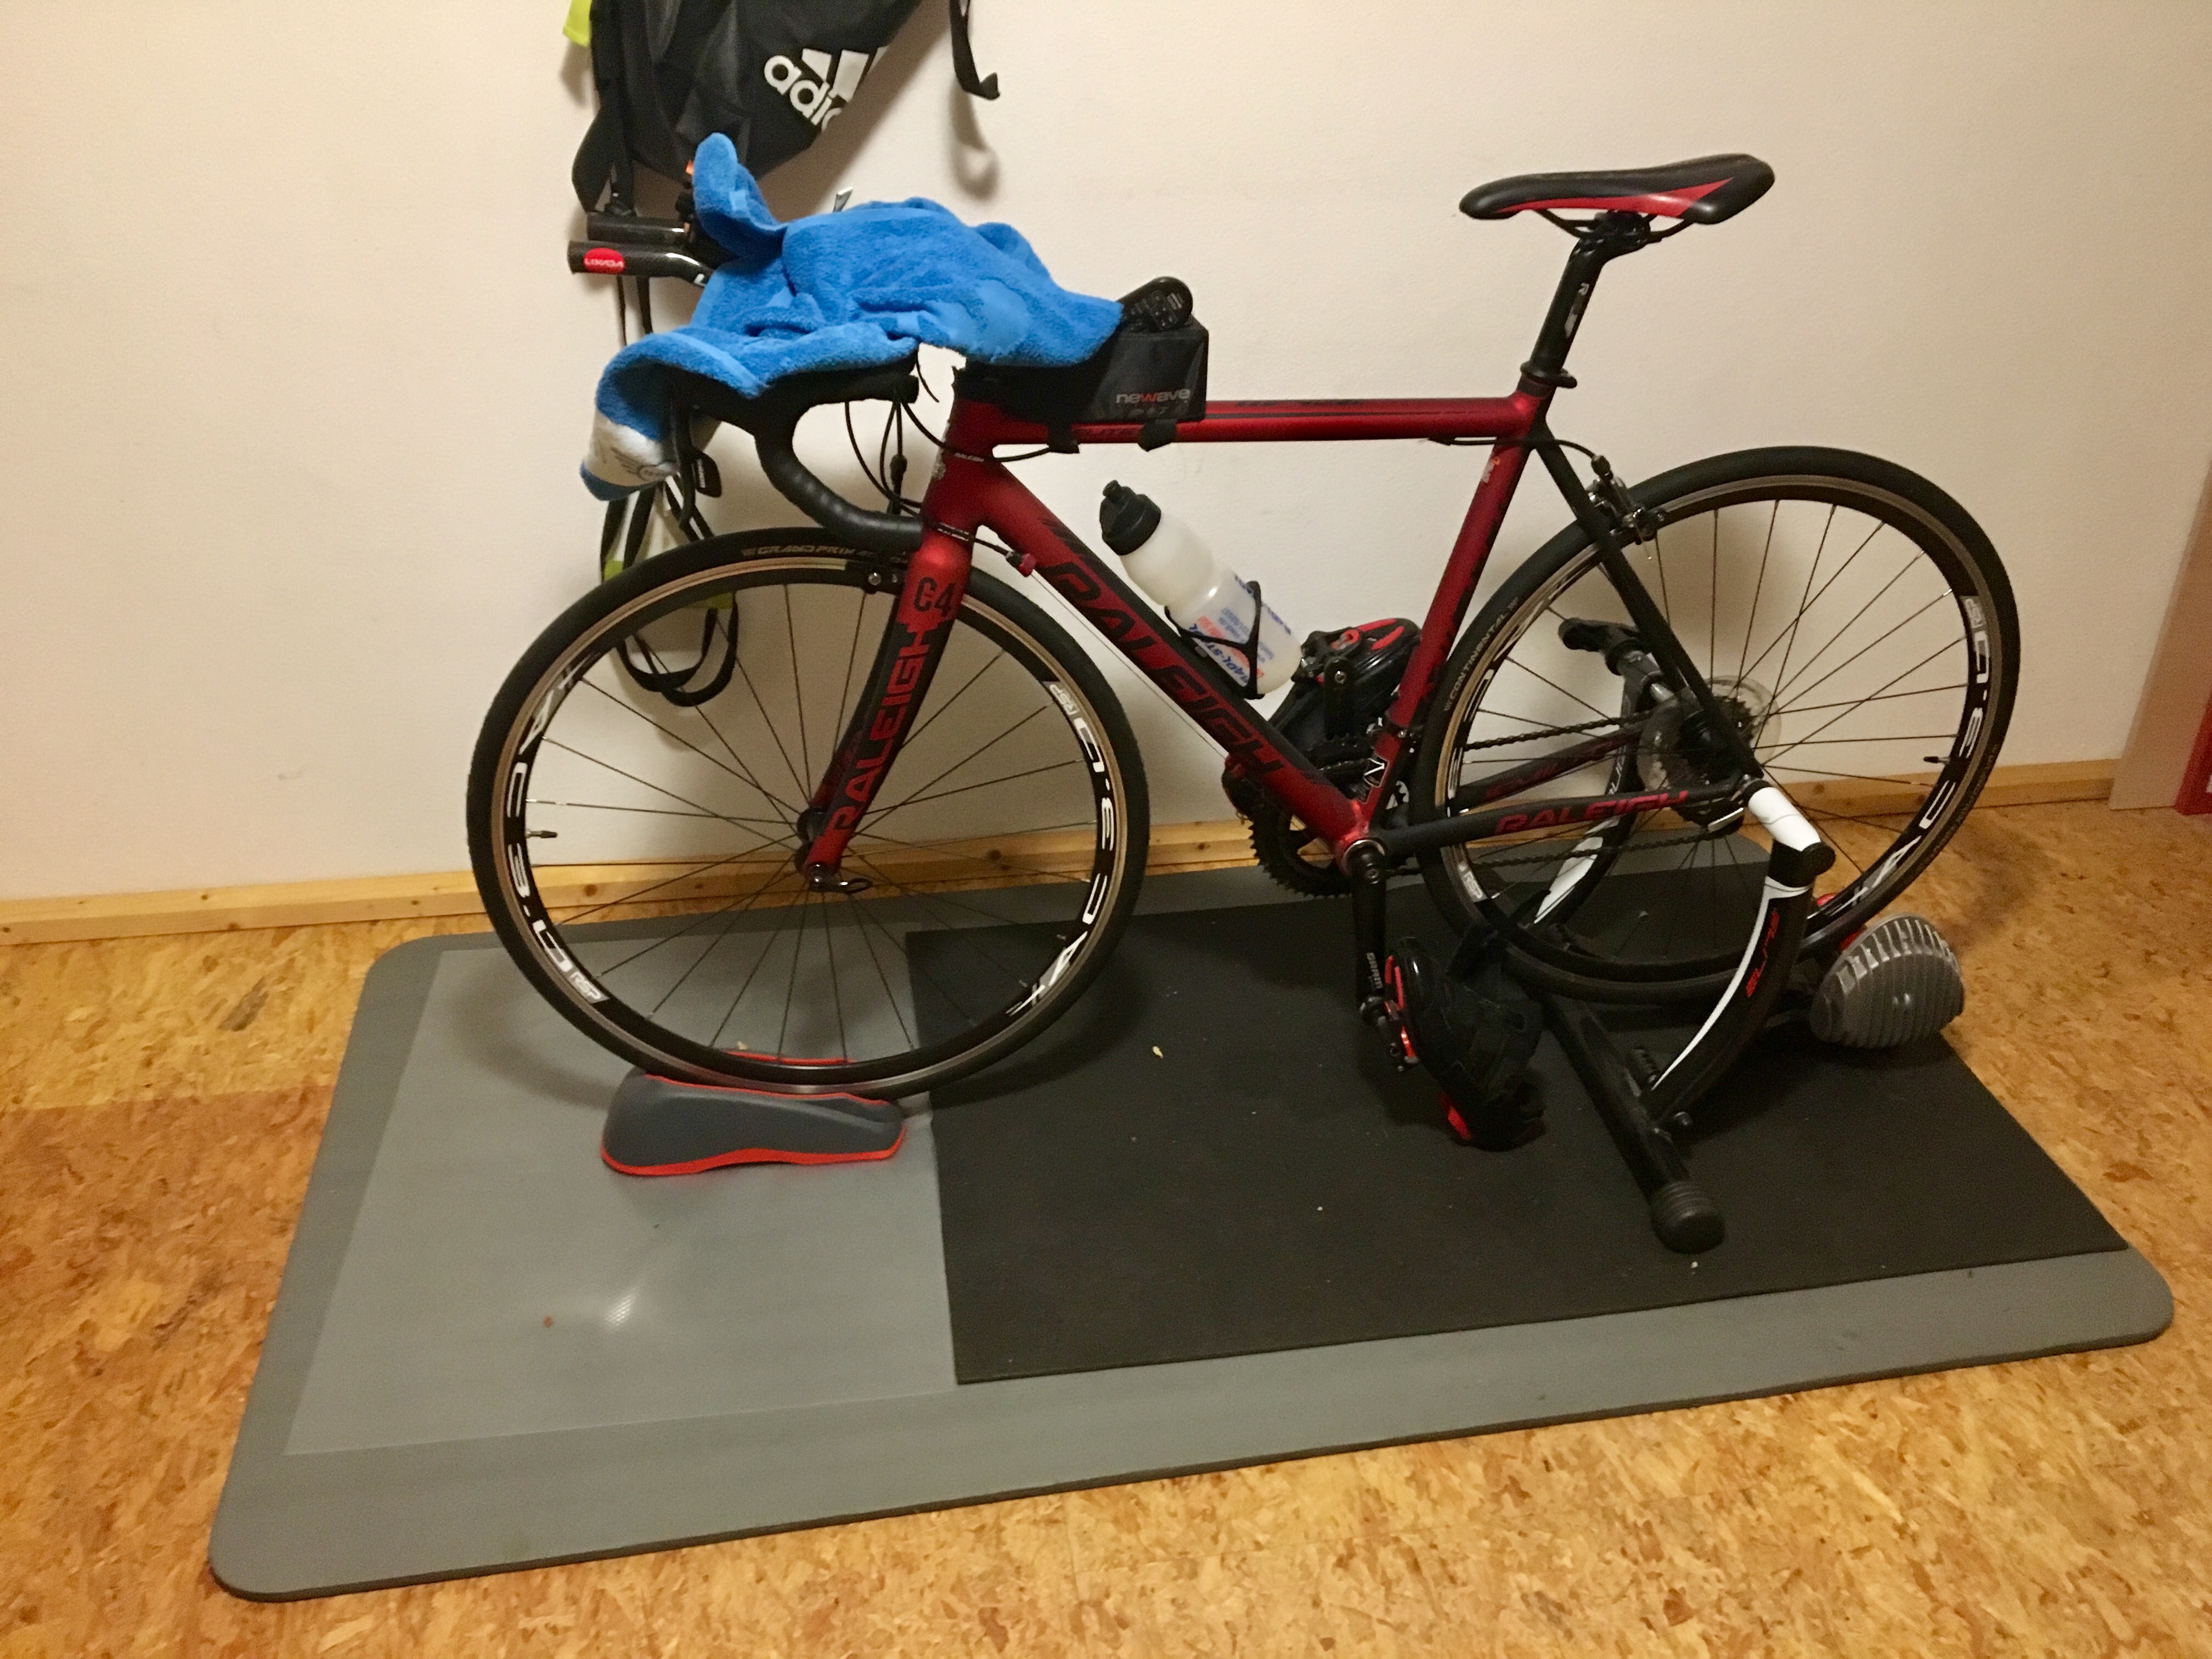
@ZeroGravity@mcneese.chad Here’s what I ended up doing today. The movement will take a bit to get used to but overall I like it after a short ride. I have LeConte tomorrow (90 minute threshold) and I’m anxious to see how my hips / legs react.
Materials -
Yes4All Balance Pods
Rubber cups - 8 x 1 3/4" (secured to plywood with 1/2" wood screw about 3" from edges). Probably unnecessary but I wanted then to get the pods in the correct position every time as well as the legs of the trainer.
2’ x 3’ x 15/32" plywood
Ratchet strap (inspiration from Chad’s YouTube video)
I needed to adjust the front pods directly under the legs to make the board a little more stable and reduce the ‘creaking’ from board flex. I say this because I really felt like I was fighting the trainer and had an erratic cadence during my over/under Laconte workout.
I’m still fiddling with front tire height to find the ‘sweet-spot’ and following your advise to about an inch or so above the rear axle.
The movement caused by pedal stroke, especially at higher cadences and watts, was crazy; is this pretty common? I had no idea I moved THAT much! I’ve since been working on a smoother cadence. Standing out of the saddle is smooth and not as quad intensive, as well.
My hips/quads aren’t nearly as fatigued as being static and I feel like I’m more comfortable in the saddle.
Overall, I’m really impressed with my build (especially since I have limited space) and I hope I will see gains as my training time increases.
I use either thick deck material, or double-layers of thinner material, or metal reinforcements bolted to the deck to strengthen them. I dislike unintended flex and aim to have a deck and support to the springs with minimal deflection. You might consider adding strength to counter the flex.
Yeah, play with the height. Some people like the increase while others prefer flat. I tend to mix around now that I have a Wahoo Climb and can adjust on the fly.
This is the pro/con of using a rocker. The allowance of movement means you need to control it. On a rigid trainer, we can get away with sloppier technique. A rocker can show off-balance pedaling and lack of core engagement. I focus on being smooth through the circle (Coach Chad’s instructional text is a great guide for this), and consider how you are stabilizing yourself via the trunk around your waist. You won’t (and don’t want) to eliminate all the movement, but it should be clean and controlled.
Great to hear. This helps show what I see as the stark difference between fixed and rocking trainers.
Awesome news. I am curious to see how you adapt and what you think about it after more sessions.
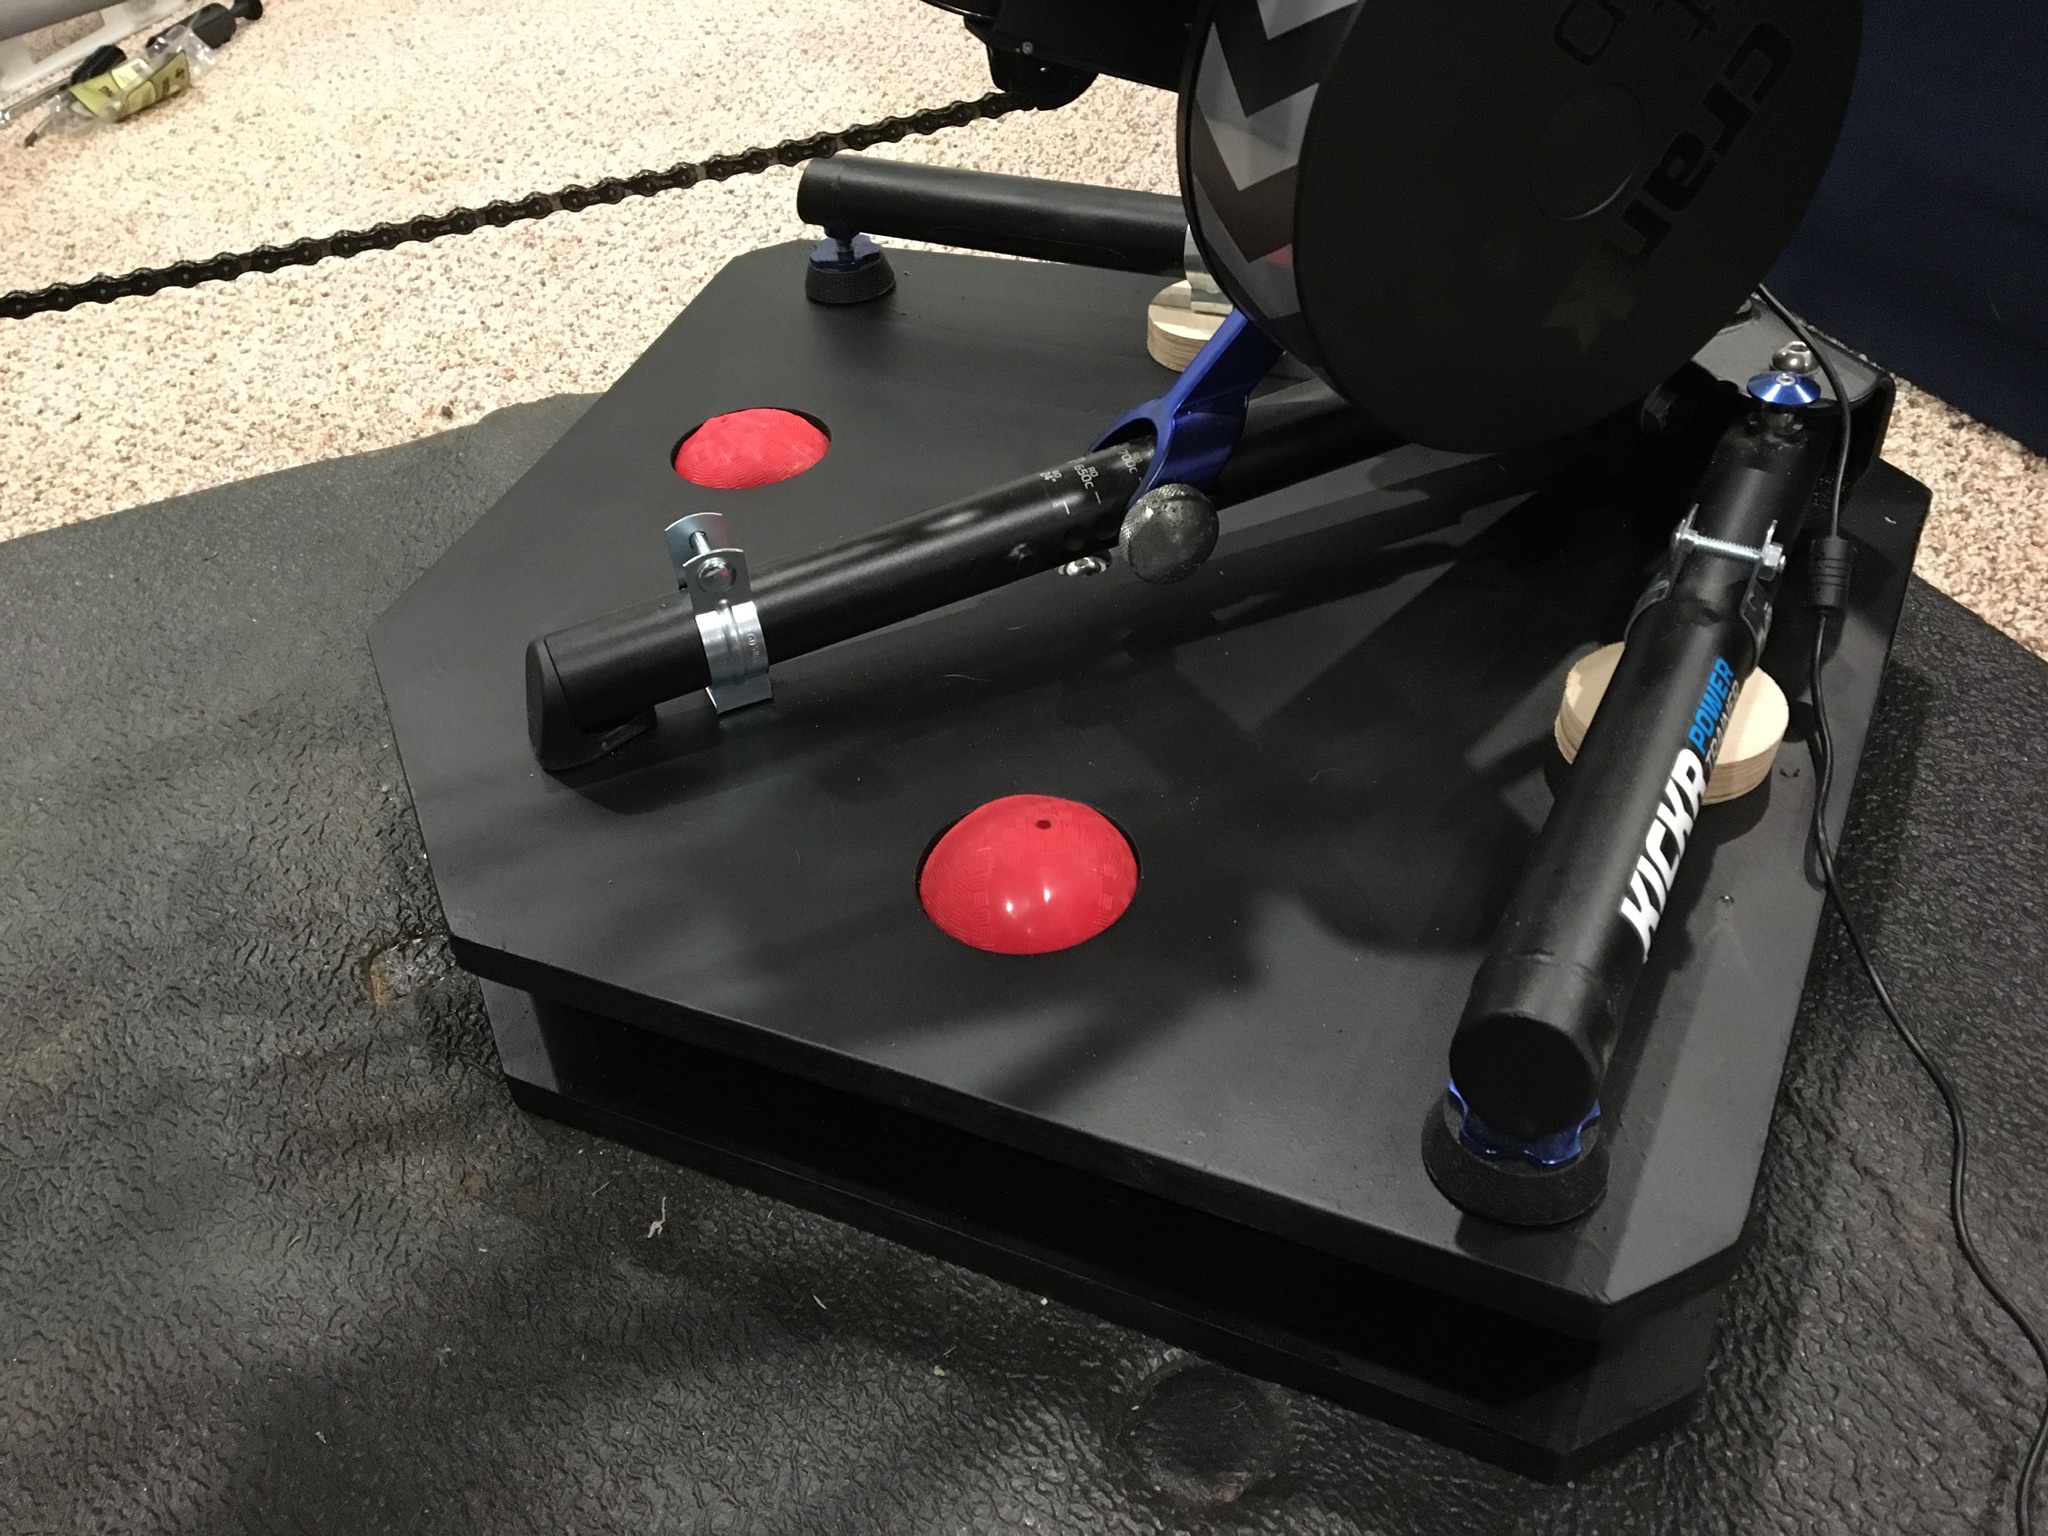
Chad I’m having a heck of a time leveling the deck of the rocker plate with a kickr. Seems the left hand side with the flywheel is heavier and therefore needs more support. Have you experienced this? I’m going to try the kids blow up ball route to fine tune but at this point I can’t ride it at all as I’m having to lean one way or the other which is going to cause an injury. I’m using some cut up foam from a delivery and admittedly it has crushed on one side so it isn’t the best option but it is so fiddly trying to get the support from the springs to be even on both sides I may end up bailing on the entire idea if I’m not able to figure this out fairly quickly.
Did the 2.5h “disaster-half” workout today. To take out a bit of the stiffnes in the trainer setup i tried the poor man’s rocker … umhm … mat.
So i put my 15mm gymastic/exercise foam mat and on top of that the 5mm trainer mat under my trainer. Fast and easy.
Not much motion but enough for me to feel more comfortable on that long ride especially, when standing.
On sprints it felt a bit to bouncy and wobbely. Maybe because the front wheel was also on the mat.
Completed my first rocker plate ride today (Perkins-2). Made a big difference in my comfort on the saddle. Thanks to @mcneese.chad for the encouragement and support. I encourage you all to build one for yourselves.
After about a month in the saddle I can tell you that this has made a big difference during SSB MV. In fact, I did Taku a few weeks a ago (sans rocker) and it felt like I was bolted to the floor with my hips ‘achy’ at the end.
I’m still playing around with pod positioning and front wheel height but overall for the $50 I spent, totally worth it in overall comfort and performance.
Just ordered the balance pods and during the upcoming break going to try out the @ZeroGravity build and possibly add the rubber cups from @pwandoff design.
Definitely thinking at least 1/2 plywood from the comments, but at 200lbs was wondering what @mcneese.chad would recommend? Trying to keep it simple, not too hung ho on multi-layer if I can get rigid platform from thicker plywood or some other material.
Any issues with u-bolt strap (with protective material)?